创建代码仓库
首先创建 GitHub Pages 站点。该仓库可见性必须是 Public。
另外创建一个仓库用来存放 Hugo 的源文件,名称随意,这里我的仓库名叫 blogs。建议将仓库可见性设置成 Private 以保护好文章 .md 文件。
创建完毕后账户下将存在以下两个代码仓库:
公有仓库:
https://github.com/lorenwe/lorenwe.github.io私有仓库:
https://github.com/lorenwe/blogs
创建 Workflow 配置
在 blogs 仓库下新建 .github/workflows/deploy.yml 文件。内容如下:
name: deploy
on:
  push:
    branches:
      - main
jobs:
  deploy:
    runs-on: ubuntu-latest

    steps:
      - name: Check out source
        uses: actions/checkout@v2
        with:
          submodules: true
          fetch-depth: 0

      - name: Setup hugo
        uses: peaceiris/actions-hugo@v2
        with:
          hugo-version: "latest"
          extended: true # 设置是否需要 extended 版本

      - name: Fetch Hugo Themes  # Fetch Hugo themes
        run: git submodule update --init --recursive

      - name: Build
        run: hugo --minify

      - name: Deploy to GitHub Pages
        uses: peaceiris/actions-gh-pages@v3
        with:
          deploy_key: ${{ secrets.DEPLOY_TOKEN }} # 另外还支持 github_token 和 personal_token
          external_repository: lorenwe/lorenwe.github.io # 修改为你的 GitHub Pages 仓库
          publish_branch: main
          publish_dir: ./public
          keep_files: false
          cname: lorenwe.eu.org # 如果使用自定义域名,还需要添加下面一行配置
设置 SSH Key
GitHub Pages action 支持三种身份验证方式:
deploy_key github_token personal_token 此处使用 deploy_key 方式。
执行命令创建 SSH Key:ssh-keygen -t rsa -b 4096 -C "$(git config user.email)" -f gh-pages -N ""
Admin@DESKTOP-0O5ASOH MINGW64 ~/Desktop/blogs (main)
$ ssh-keygen -t rsa -b 4096 -C "$(git config user.email)" -f gh-pages -N ""
Generating public/private rsa key pair.
Your identification has been saved in gh-pages
Your public key has been saved in gh-pages.pub
The key fingerprint is:
SHA256:hXyduwgFN52vCsct9UUPVeXOiBZ+SZAcc26/KgL9Om0 [email protected]
The key's randomart image is:
+---[RSA 4096]----+
|        . oo++..*|
|       . + o=*...|
|        o + +.+oo|
|         + ..*.*o|
|        S. o=o+.+|
|       ..o+ooo. .|
|        .o+o.  . |
|         o.E  .  |
|         .= ..   |
+----[SHA256]-----+
该命令会在当前命令行所在目录下生成两个密钥对文件 gh-pages 和 gh-pages.pub, 如果在 Windows 系统下运行该命令,要将命令中的 $(git config user.email) 替换成你的邮箱地址。
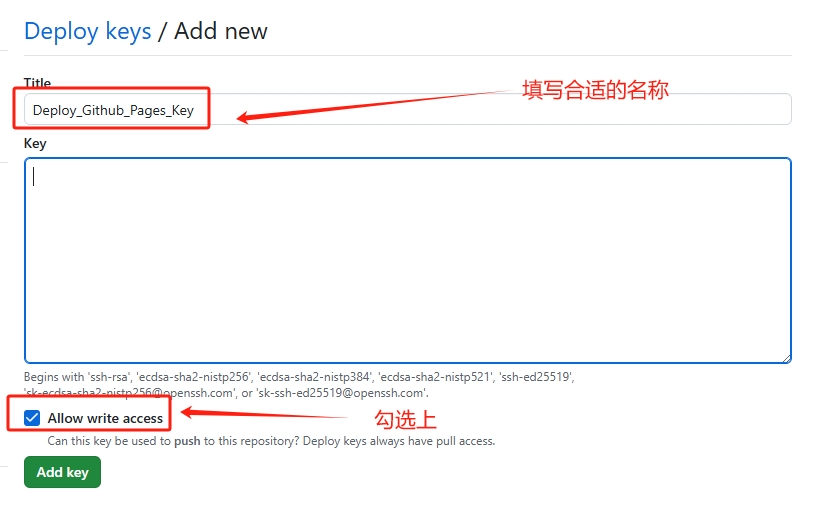
先为GitHub Pages 站点仓库设置公钥,访问如下地址设置 Public key:
https://github.com/lorenwe/lorenwe.github.io/settings/keys/new
表单中的 Title 随意填写,将刚才生成的 gh-pages.pub 文件内容填入 Key 中,勾选 Allow write access,点击 Add key 按钮保存。如图:
添加完成后的结果:

再为文章源码仓库设置私钥,访问如下地址设置 Private key:
https://github.com/lorenwe/blogs/settings/secrets/actions/new
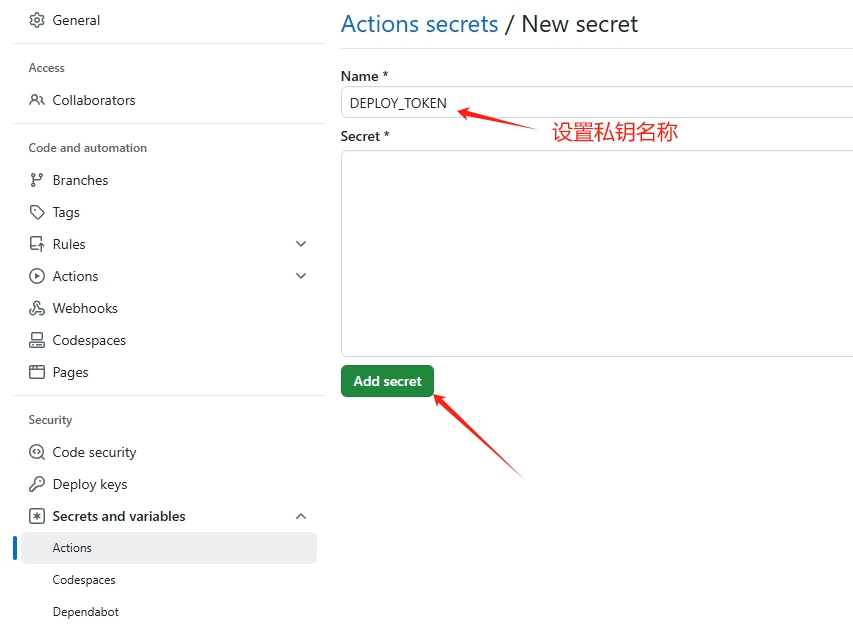
表单中的 Name 填入 DEPLOY_TOKEN,将刚才生成的 gh-pages 文件内容填入 Secret 中,点击 Add secret 按钮保存。
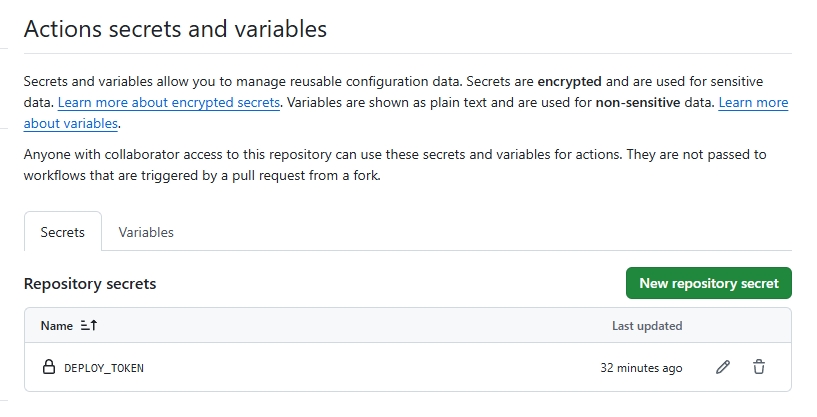
添加完成后的结果:
执行 GitHub Actions
将 blogs 仓库的代码提交并推送到 GitHub,会自动触发 GitHub Actions 执行。可以访问如下网址来查看 Workflows 是否执行成功:
https://github.com/lorenwe/blogs/actions
等待 workflow 执行完毕,静态站点就算是发布成功了。
注:文章内所有 GitHub 链接都要替换成自己的仓库链接,例如:
https://github.com/<YourName>/<YourName>.github.io
https://github.com/<YourName>/blogs